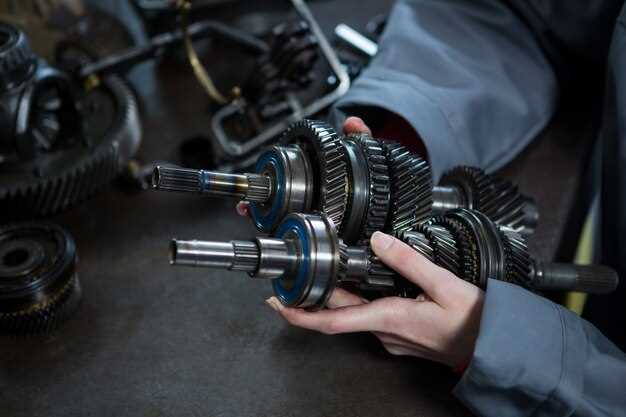
Rebuilding a manual transmission can seem like a daunting task, but with the right knowledge and tools, it can be a rewarding project for any automotive enthusiast. This guide aims to walk you through the entire process, from disassembly to reassembly, ensuring that you understand each step along the way.
Understanding the components of a manual transmission is crucial before diving into the rebuild. From synchronizers to gears, every part plays a significant role in the functionality of the system. Familiarizing yourself with these components will enhance your ability to troubleshoot problems and perform repairs effectively.
In addition to technical knowledge, having the right tools is essential for a smooth rebuilding process. Invest in high-quality sockets, wrenches, and specialized tools like fish wires and torque wrenches. Preparation is key; ensuring you have everything at your disposal will save time and frustration.
This guide will provide detailed instructions and tips on each step, empowering you to successfully rebuild your manual transmission. Whether you’re looking to improve shifting performance or simply enjoy the satisfaction of a job well done, this comprehensive resource will serve you well.
Gathering Necessary Tools and Parts for the Rebuild

Before starting the rebuild of your manual transmission, it is essential to gather all necessary tools and parts. This preparation ensures a smooth process and minimizes interruptions once you begin the disassembly and reassembly.
Essential Tools: Start with a comprehensive set of hand tools. You will need a variety of sockets, wrenches, and screwdrivers to handle different fasteners. Torque wrench is critical for ensuring that all bolts are tightened to manufacturer specifications, preventing future failures. A pneumatic impact wrench can make it easier to remove stubborn fasteners, especially on older transmissions.
Additionally, acquire a gear puller or locking pliers for disassembling components that are tightly fitted. A flywheel holder may be necessary for servicing the flywheel and clutch components. Don’t forget a magnetic tray or small containers for organizing screws and small parts during the rebuild.
Safety Equipment: Safety should not be overlooked. Equip yourself with safety glasses and gloves to protect against sharp edges and debris. Hearing protection may also be advisable during noisy operations such as drilling or using an impact wrench.
Parts Required: You must also gather all the necessary replacement parts for the rebuild. Begin by consulting a repair manual specific to your vehicle and transmission model to identify the required parts. Common replacement items include seals, gaskets, and bearings. Consider replacing the clutch kit if it shows signs of wear.
In addition to consumables, inspect internal components such as synchros, gears, and shift forks for wear or damage. You may need to order new parts based on your findings, so it’s beneficial to have the transmission disassembled fully to assess its condition accurately.
Lastly, establish a good supplier network or consider online options for sourcing hard-to-find parts. Having everything on hand before beginning will save you valuable time and ensure a more efficient rebuild process.
Disassembling the Transmission: A Step-by-Step Process

Disassembling a manual transmission requires careful attention to detail and a systematic approach. Begin by gathering the necessary tools, including a socket set, wrenches, screwdrivers, pliers, and a magnetic tray for small parts. Safety equipment, such as gloves and eye protection, is also essential.
Start by removing the transmission from the vehicle. Disconnect the shift linkage, speedometer cable, and any electrical connectors. Then, support the transmission with a jack and unbolt it from the engine. Slide the transmission out while being cautious of any remaining connections.
Once the transmission is on a clean workbench, begin disassembly. Start by removing the exterior components. Take off the bellhousing by unbolting it from the main case. Keep track of all bolts and components, placing them in labeled containers to avoid confusion during reassembly.
Next, remove the shift cover. This is typically held in place by screws. After the cover is off, proceed to extract the shift forks and their corresponding rods. These components can usually be pulled straight out of the case.
Move on to the next section of the transmission, focusing on the main shaft. Carefully unbolt the bearing retainers and slide the main shaft out of the case. Pay attention to the order of washers and spacers as they may need to be reinstalled in the same sequence.
At this point, ensure you remove the countershaft by unbolting its retaining bolts. Extract this component carefully to prevent damage to the gears and bearings. Once removed, inspect all associated parts for wear or damage.
Finally, take apart the sliding gears and synchronizers from the main shaft. Gently tap them with a soft mallet if they are stuck, but avoid excessive force to prevent causing cracks or chips. Document the arrangement of the components as you work, as this will assist in reassembly.
With all parts disassembled, you should now have a completely disassembled manual transmission. Carefully clean each component and inspect for wear or damage before proceeding with the rebuilding process. Proper documentation during disassembly will greatly aid in efficient reassembly, ensuring a successful rebuild of the transmission.
Reassembling and Testing Your Rebuilt Transmission
Reassembling a rebuilt manual transmission requires attention to detail and precision. Begin by ensuring all parts are clean and free of debris. Start the reassembly by placing the main housing on a clean work surface. Install the input shaft and ensure it is correctly aligned with the bearings. Use the original shims to maintain proper spacing, and apply assembly grease to encourage smooth operation.
Next, carefully install the countershaft. Ensure that the gears are aligned correctly and that the thrust washers are in place. As you install the gears, maintain the proper sequences as outlined in your service manual. Secure each component with the appropriate fasteners, and torque them to the manufacturer’s specifications to prevent any loosening during operation.
After the main assembly is complete, it’s crucial to check the synchronizers. Ensure they engage smoothly by performing a visual inspection and a manual function test. Lubricate all moving components before sealing the transmission case. Additionally, replace any worn seals and gaskets to prevent leaks.
Once reassembly is complete, it’s time for testing. Begin by filling the transmission with the recommended type and amount of gear oil. This step is vital as it will ensure proper lubrication for all moving parts. Turn the output shaft by hand to confirm that all parts move freely without binding.
Next, conduct a bench test by spinning the input shaft while monitoring the output shaft’s movement. The gears should engage seamlessly, and there should be no unusual noises. If you notice any grinding or binding, disassemble the transmission to identify the issue before proceeding.
After a successful bench test, install the rebuilt transmission back into the vehicle. Connect all linkage, wiring, and drive shafts as per the service manual instructions. Upon installation, fill the transmission with fluid once more, and perform a fluid leak check.
Finally, conduct a road test to evaluate performance. Pay attention to shifting smoothness, any unusual sounds, and responsiveness. Ensure all gears engage correctly and that the transmission operates quietly. If any problems arise, make the necessary adjustments to rectify them. A thorough test will ensure a reliable rebuilt transmission that performs effectively.


